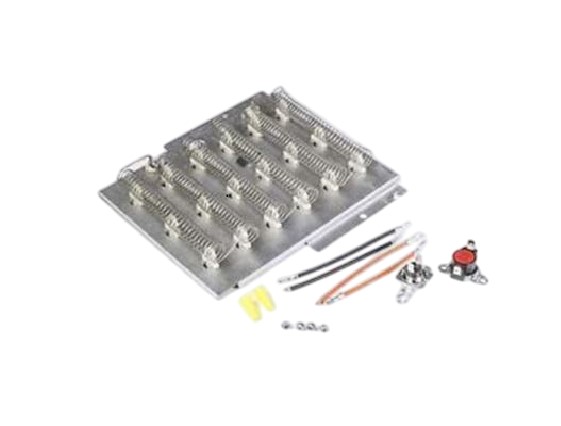

Speed Queen 964P3 Dryer Heater Kit 5350W/240V
$94.11
Price reduced from
$131.76
More Information:
This Part Fits the Following Models
25 models
Speed Queen ADE3SRGS173TW01 Dryer
Speed Queen ADE3SRGS175TW01-START-S#2001000001 Dryer
Speed Queen ADE3SRGS175TW01-THRU-S#1912999999 Dryer
Speed Queen ADEE9RGS175TW01-THRU-S#1912999999 Dryer
Speed Queen ADEE9BGS175TW01 THRU S#1912999999 Dryer
Speed Queen ADEE9BSS175TN01-START-S#2001000001 Dryer
Speed Queen ADEE9BSS175TN01-THRU-S#1912999999 Dryer
Speed Queen ADEE9RGS173TW01 Dryer
Speed Queen ADEE9RGS175TW01-START-S#2001000001 Dryer
Speed Queen ASEE8AGW173TW01 Dryer
Speed Queen ASGE8AGW113TW01 Dryer
Speed Queen LES17AWF Dryer
Speed Queen FGS17AWF Dryer
Speed Queen ADEE9BGS175TW01 START S#2001000001 Dryer
Speed Queen ADEE8RGS173TW01 Dryer
Speed Queen ADEE9BGS173TW01 Dryer
Speed Queen ADE4BRGS176TW01 THRU S#1912999999 Dryer
Speed Queen ADE4BRGS177TW01 START S#2001000001 Dryer
Speed Queen ADE4BRGS175TW01 START S#2001000001 Dryer
Speed Queen ADE3SRGS177TW01-START-S#2001000001 Dryer
Speed Queen ADE4BRGS175TW01 THRU S#1912999999 Dryer
Speed Queen ADE4BRGS176TW01 START S#2001000001 Dryer
Speed Queen ATEE9ASP176TW01 Laundry Center/Combo
Speed Queen ATEE9ASP175TW01 Laundry Center/Combo
Speed Queen ATEE9AGP173TW01 Laundry Center
No models found matching ""
Showing
of 25.0
Step 1: The dryer should be disconnected from the electrical outlet to guarantee safety.
Step 2: The back panel should be taken off. To accomplish this, a Phillips head screwdriver should be utilized to remove the screws holding the panel in place. Then, the panel should be carefully pulled away.
Step 3: The gas line should be unlinked. The fasteners securing the gas line should be taken off and it should be gently pulled away.
Step 4: The vent hose should be separated. The fasteners that attach it to the rear of the dryer should be unscrewed and it should be pulled away.
Step 5: The old heater kit should be removed. The fasteners that hold the old heater kit should be unscrewed and it should be extracted from the dryer.
Step 6: The new heater kit should be fitted. The new heater kit should be positioned in the same location as the old one and it should be secured with the screws.
Step 7: The vent hose should be reconnected. The vent hose should be firmly attached to the rear of the dryer using screws.
Step 8: The gas line should be reattached. The gas line should be positioned back as it was and it should be secured in place.
Step 9: The back panel should be replaced. The back panel should be set back into its original position and it should be screwed in place.
Step 10: The dryer should be reconnected to the power outlet.
Your 964P3 Speed Queen Dryer Heater Kit-Org-5350W/240V/60Hz has now been successfully replaced.
Remember, these instructions should be utilized as general guidance and should always be utilized alongside the manufacturer's manual, if one is available.
Step 2: The back panel should be taken off. To accomplish this, a Phillips head screwdriver should be utilized to remove the screws holding the panel in place. Then, the panel should be carefully pulled away.
Step 3: The gas line should be unlinked. The fasteners securing the gas line should be taken off and it should be gently pulled away.
Step 4: The vent hose should be separated. The fasteners that attach it to the rear of the dryer should be unscrewed and it should be pulled away.
Step 5: The old heater kit should be removed. The fasteners that hold the old heater kit should be unscrewed and it should be extracted from the dryer.
Step 6: The new heater kit should be fitted. The new heater kit should be positioned in the same location as the old one and it should be secured with the screws.
Step 7: The vent hose should be reconnected. The vent hose should be firmly attached to the rear of the dryer using screws.
Step 8: The gas line should be reattached. The gas line should be positioned back as it was and it should be secured in place.
Step 9: The back panel should be replaced. The back panel should be set back into its original position and it should be screwed in place.
Step 10: The dryer should be reconnected to the power outlet.
Your 964P3 Speed Queen Dryer Heater Kit-Org-5350W/240V/60Hz has now been successfully replaced.
Remember, these instructions should be utilized as general guidance and should always be utilized alongside the manufacturer's manual, if one is available.
Customer Reviews
No reviews yet. Be the first to write one!
Write a Review
Thank you! Your review has been submitted.