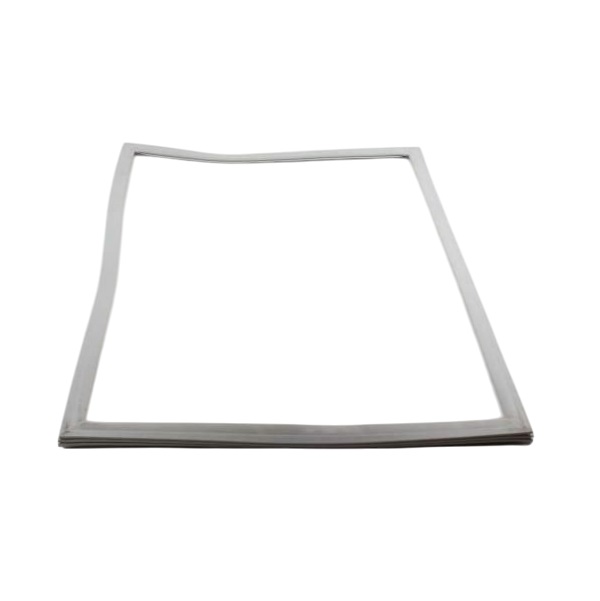

LG MDS64172922 Refrigerator Door Gasket
$72.81
Price reduced from
$80.88
More Information:
This Part Fits the Following Models
26 models
LG LFXC22526S/00 Bottom-Mount Refrigerator
LG LFXS26973S/01 Bottom-Mount Refrigerator
LG LFXS27466S/00 Bottom-Mount Refrigerator
LG LFXS27566S/00 Bottom-Mount Refrigerator
LG LFXS28566D/00 Refrigerator
LG LFXS28566S/00 Bottom-Mount Refrigerator
LG LFXS28596D/00 Bottom-Mount Refrigerator
LG LFCS27596S/00 Bottom-Mount Refrigerator
LG LFX28968D/00 Bottom-Mount Refrigerator
LG LFX28968SB/04 Bottom-Mount Refrigerator
LG Refrigerator LFXS28596S/00
LG LFC28768ST/02 Bottom-Mount Refrigerator
LG LFC28768ST-03 Bottom-Mount Refrigerator
LG Refrigerator LFXS28968S/00
LG Refrigerator LFXS28566M/00
LG Refrigerator LFXS24566S/00
LG LFX28968SW/04 Bottom-Mount Refrigerator
LG LFXC22526D/00 Refrigerator
LG Refrigerator LFCS25426D/00
LG Refrigerator LFCS25426S/00
LG Refrigerator LFX28968ST/06
LG Refrigerator LFX28968ST/03
LG Refrigerator LFX28968ST/02
LG Refrigerator LFX25973ST/05
LG Refrigerator LFX21976ST/07
LG Refrigerator LFX25973D/00
No models found matching ""
Showing
of 26.0
Step 1: Your appliance should be disconnected from the electrical source to confirm that there is no power flowing to it for safety reasons.
Step 2: The screws securing the door should be taken out. The bolts from the hinges should be removed, then a flathead screwdriver should be utilized to extract the mounting screws from the inner cabinet.
Step 3: The door should be gently elevated and an appropriately sized towel or cushion should be positioned beneath it to avoid scratching the floor.
Step 4: The gasket should be inspected for any noticeable indications of damage such as tears or cracks. If it seems fine, the next step should be continued to.
Step 5: With a razor blade, the old gasket should be carefully detached from the edges and corners of the door. Time should be taken during this step and care should be ensured gentle to avoid harming the surfaces.
Step 6: The surface of the door should be wiped thoroughly with a damp cloth and allowed to dry before moving forward.
Step 7: The new gasket should be placed into position by carefully fitting it into the edges and corners of the door.
Step 8: The mounting screws and bolts should be replaced to fasten the door securely.
Step 9: The appliance should be reconnected to the power source and you’re finished!
Please remember, these instructions should be served as general guidance and should always be utilized alongside the manufacturer's manual, if accessible.
Step 2: The screws securing the door should be taken out. The bolts from the hinges should be removed, then a flathead screwdriver should be utilized to extract the mounting screws from the inner cabinet.
Step 3: The door should be gently elevated and an appropriately sized towel or cushion should be positioned beneath it to avoid scratching the floor.
Step 4: The gasket should be inspected for any noticeable indications of damage such as tears or cracks. If it seems fine, the next step should be continued to.
Step 5: With a razor blade, the old gasket should be carefully detached from the edges and corners of the door. Time should be taken during this step and care should be ensured gentle to avoid harming the surfaces.
Step 6: The surface of the door should be wiped thoroughly with a damp cloth and allowed to dry before moving forward.
Step 7: The new gasket should be placed into position by carefully fitting it into the edges and corners of the door.
Step 8: The mounting screws and bolts should be replaced to fasten the door securely.
Step 9: The appliance should be reconnected to the power source and you’re finished!
Please remember, these instructions should be served as general guidance and should always be utilized alongside the manufacturer's manual, if accessible.
Customer Reviews
No reviews yet. Be the first to write one!
Write a Review
Thank you! Your review has been submitted.