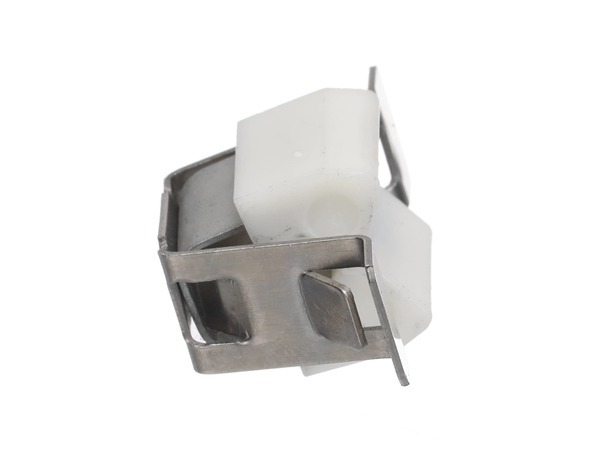

Whirlpool W11429587 Dryer Door Catch
$13.68
More Information:
This Part Fits the Following Models
17 models
Amana NGD4655EW3 GAS DRYER
Amana NGD4655EW4 LAUNDRY, RESIDENTIAL, GAS DRYER
Whirlpool WGD5050LW0 Gas Dryer
Whirlpool WGD5050LW1 Gas Dryer
Whirlpool YWED5050LW1 Electric Dryer
Whirlpool YWED5050LW0 Electric Dryer
Whirlpool YWED5010LW0 Electric Dryer
Whirlpool YWED5010LW1 Laundry Center
Whirlpool WGD4616FW3 Laundry Center
Whirlpool WED500CMW0 Laundry Center
Whirlpool WED5050LW1 Electric Dryer
Whirlpool WED5050LW0 Electric Dryer
Whirlpool WGD4985EW1 Laundry, Residential, Gas Dryer, 29 Inch
Whirlpool WGD4616FW2 Laundry, Residential, Gas Dryer
Whirlpool WGD500CMW1 Laundry Center
Whirlpool WGD5050LW2 Laundry Center
Whirlpool WGD5050LW3 Laundry Center
No models found matching ""
Showing
of 17.0
Step 1: Start by collecting the essential tools required for the task, including an Allen wrench, flat-head screwdriver, and a replacement Whirlpool W11429587 catch.
Step 2: The refrigerator door should be examined for any screws or fasteners located around the edges and them taken out using the suitable tool.
Step 3: After all screws are loosened, the outer panel of the refrigerator door should be gently removed and placed aside.
Step 4: The catch that keeps the door closed should be identified and an Allen wrench utilized to loosen the screws securing it.
Step 5: The old catch should be carefully extracted using a pair of needle-nose pliers.
Step 6: The new Whirlpool W11429587 catch should be inserted into the opening and aligned with the mounting holes on the refrigerator door.
Step 7: The catch should be fastened using the screws that were removed previously and them tightened with the Allen wrench.
Step 8: The refrigerator door panel should be reattached and any screws or fasteners that were taken out in step two secured.
Step 9: The refrigerator door should be verified to confirm it closes securely and that the new Whirlpool W11429587 catch functions correctly.
Step 10: Any required parts should be reinstalled and the work area tidied up once the repair has been finalized.
Please note that these instructions serve as general guidance and should always be utilized alongside the manufacturer's manual, if accessible.
Step 2: The refrigerator door should be examined for any screws or fasteners located around the edges and them taken out using the suitable tool.
Step 3: After all screws are loosened, the outer panel of the refrigerator door should be gently removed and placed aside.
Step 4: The catch that keeps the door closed should be identified and an Allen wrench utilized to loosen the screws securing it.
Step 5: The old catch should be carefully extracted using a pair of needle-nose pliers.
Step 6: The new Whirlpool W11429587 catch should be inserted into the opening and aligned with the mounting holes on the refrigerator door.
Step 7: The catch should be fastened using the screws that were removed previously and them tightened with the Allen wrench.
Step 8: The refrigerator door panel should be reattached and any screws or fasteners that were taken out in step two secured.
Step 9: The refrigerator door should be verified to confirm it closes securely and that the new Whirlpool W11429587 catch functions correctly.
Step 10: Any required parts should be reinstalled and the work area tidied up once the repair has been finalized.
Please note that these instructions serve as general guidance and should always be utilized alongside the manufacturer's manual, if accessible.
Customer Reviews
No reviews yet. Be the first to write one!
Write a Review
Thank you! Your review has been submitted.